Technical flats · 7 min read
How to draw a T-shirt flat sketch in Illustrator
A T-shirt is the best first flat, since it has only a few pieces and every skill you need. Follow along with a picture at each stage.
The short answer
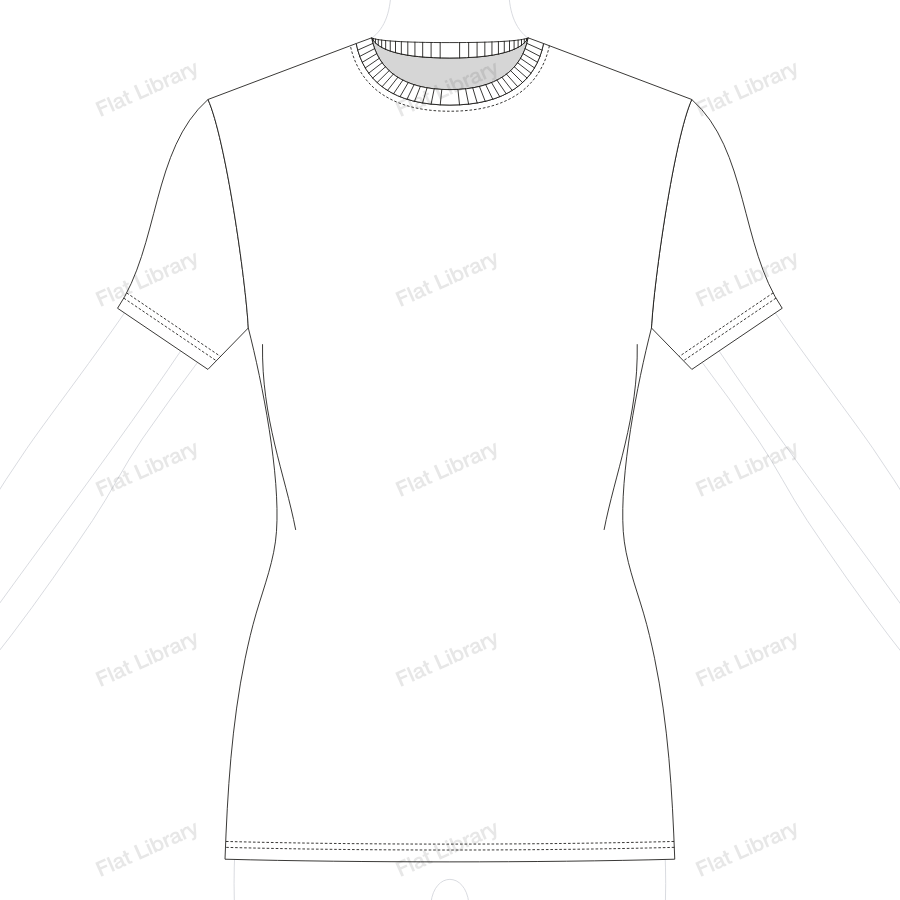
To draw a T-shirt flat in Illustrator, place a body template on a locked layer, then use the Pen tool to draw half the body and one sleeve on one side of a centre guide. Add the neckband, mirror everything across the guide, and join the body halves. Finish with dashed stitch lines at the neck and hems, then copy the front to make the back.
This walkthrough assumes you know where the Pen tool is and not much else. If you want the wider method for other garments, read the guide to drawing technical flats in Illustrator.
Step 1: Set up the file
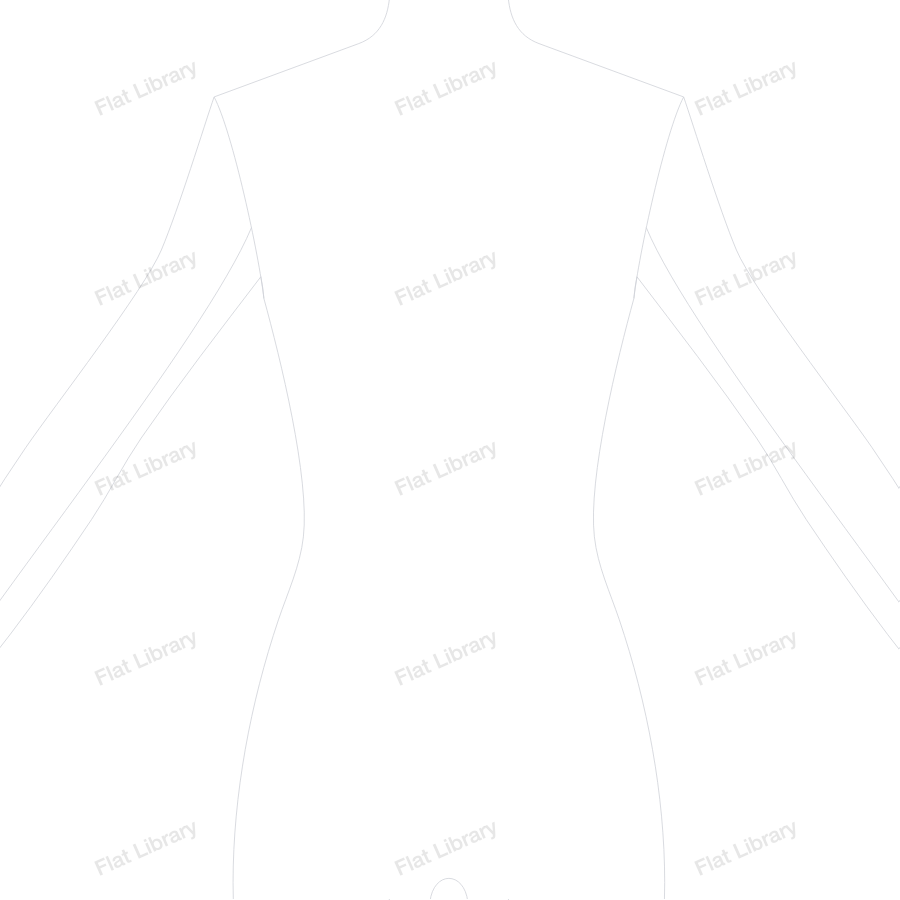
Make a new document. Set the stroke to 1 pt black and the fill to white. Place your body template on a layer called Template, set it to light grey, and lock it. Pull a vertical guide down the centre of the body.
Step 2: Draw half the body
Make a new layer called Body. Take the Pen tool and work around half the T-shirt, on the right of the guide:
- Click on the centre line at the bottom of the front neck, then drag out a short horizontal handle, so the neck will mirror cleanly.
- Click up at the neck point, where the shoulder meets the neck. That curve is your neckline.
- Click that neck point once more to drop its handle, then click at the shoulder point, a little lower and well out from the neck. Shoulders slope, so this line is never level.
- Draw the armhole down to the underarm, with a slight curve in towards the body.
- Draw the side seam down to the hem, following the template. A regular T-shirt has little shaping, and a fitted one has more.
- Finish with a nearly straight line back to the centre, meeting it at a right angle.
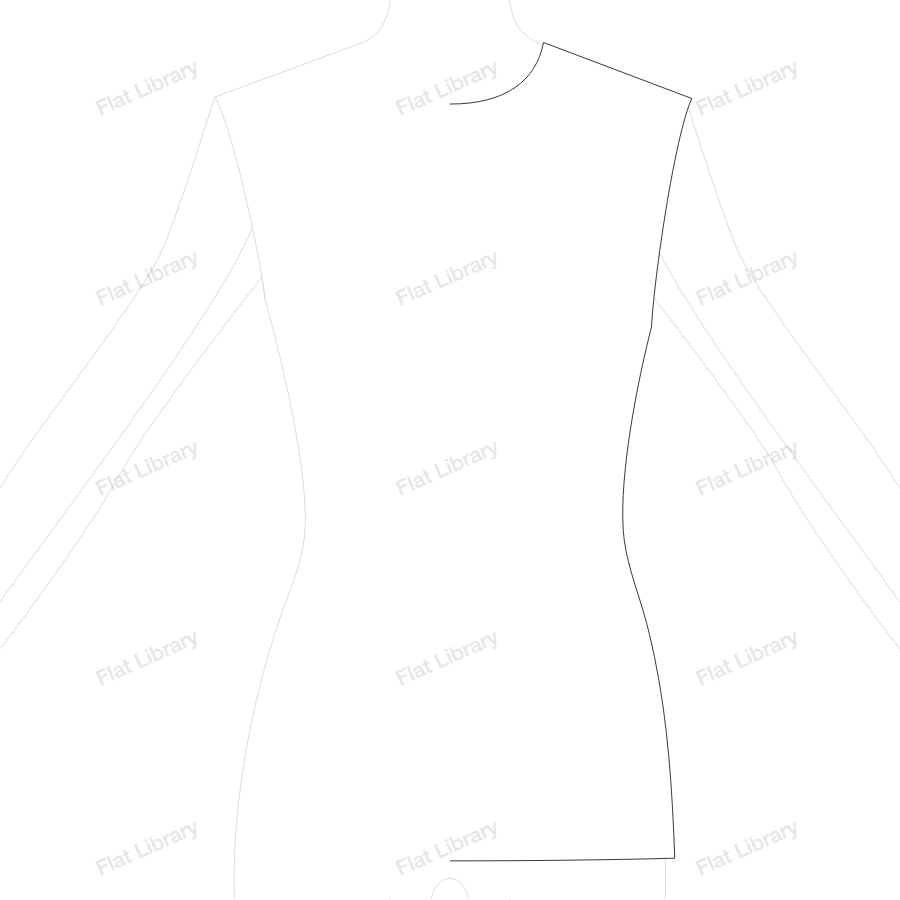
Press A and adjust any anchor that looks wrong. Be patient with this outline, because everything else depends on it.
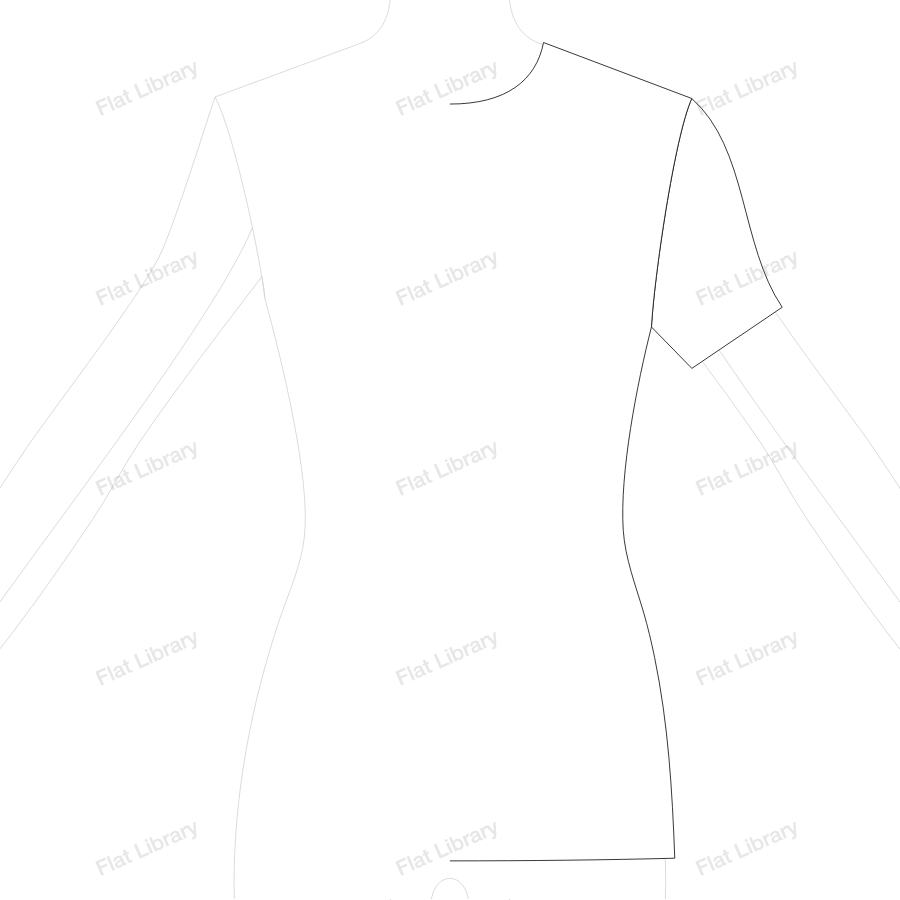
Step 3: Add the sleeve
Make a new layer called Sleeve, and put it under the Body layer. Draw the sleeve as a closed shape:
- Start at the shoulder point.
- Curve out and down along the top of the sleeve to the outer corner of the sleeve hem.
- Draw a straight line across the sleeve hem. It should be close to a right angle to the sleeve.
- Come back up to the underarm.
- Follow the armhole back up to the shoulder point.
Most T-shirt sleeves drawn by beginners come out too short and too narrow. Check yours against the arm on the template.
Step 4: Add the neckband
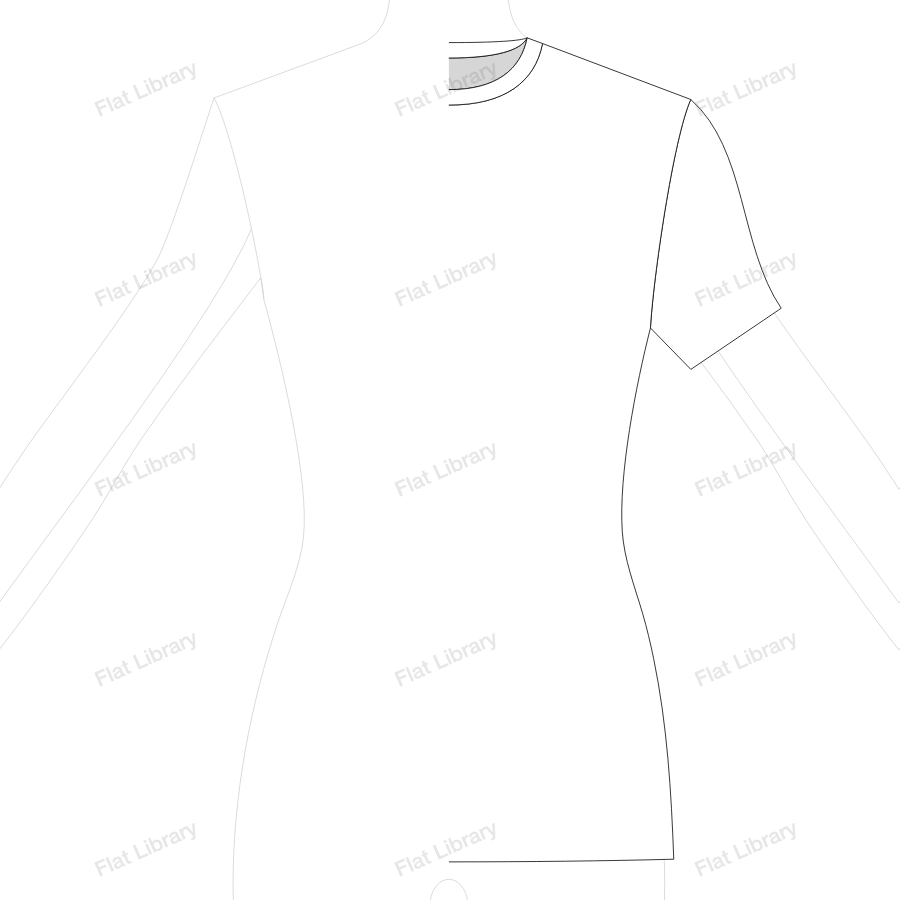
A crew neck has a rib band that follows the neckline, and you can see the inside back neck through it.
- On a new layer called Neckband, draw the inside back neck as a closed shape. It runs from one neck point, along the high back neckline, to the centre and down to the front neckline. Fill it with a light grey, so it reads as the inside of the garment.
- Select the front neckline curve. Use Object > Path > Offset Path with a small distance to get a parallel line, which is the outer edge of the band.
- Connect the two curves at the shoulder end, to make a closed band shape.
Step 5: Mirror and join
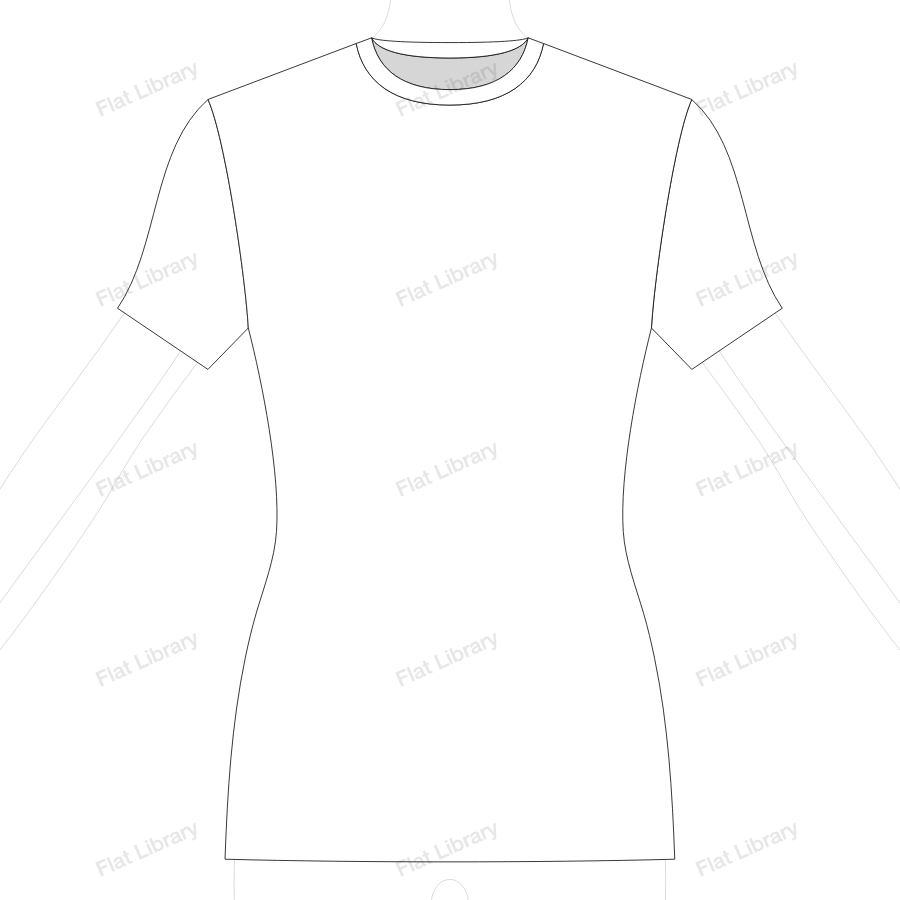
- Select the body, the sleeve and the neck pieces you drew. Do not select the template.
- Press O, hold Option and click the centre guide. Choose Vertical and click Copy.
- Use the Direct Selection tool to select the two body anchors at the bottom of the neck, then press Cmd + J. Repeat at the hem.
- Join the neckband halves and inside neck shapes the same way.
Your sleeves stay as two separate shapes. That is how the garment is really built, and it makes life easier when you add colour later.
Step 6: Add the stitching
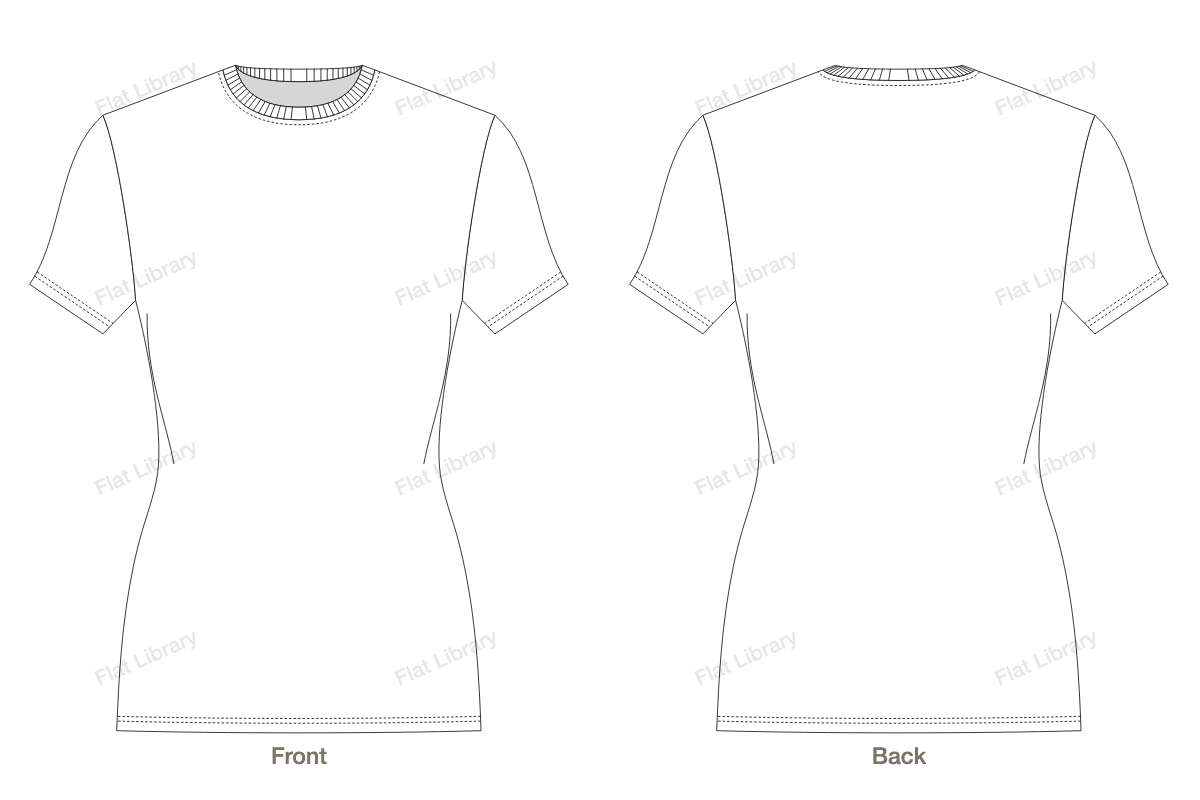
Make a layer called Stitching. A standard T-shirt has three kinds of detail to add:
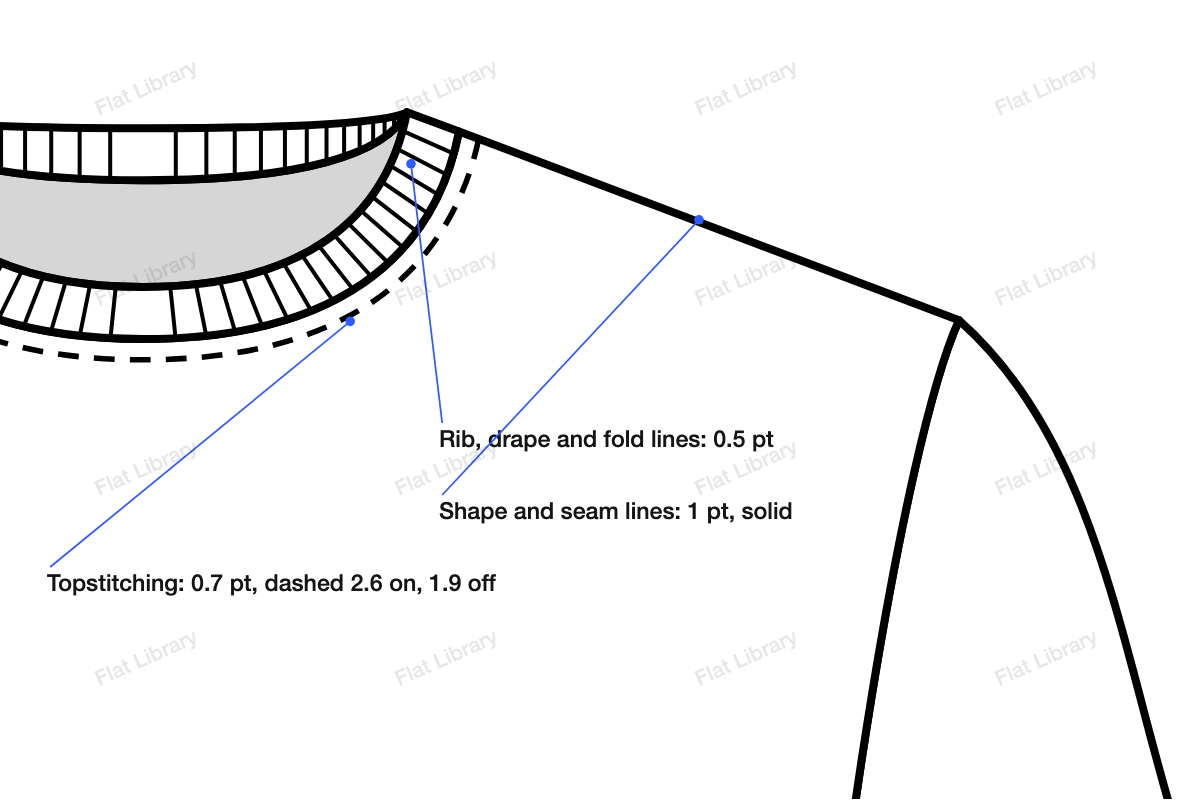
- Hems. Copy the bottom edge, move it up by the depth of the hem, and set the stroke to about 0.7 pt with a dash of 2.6 and a gap of 1.9. Add a second parallel line just below it, for a twin needle look. Do the same on both sleeves.
- Neck topstitch. Offset the neckline so a single dashed line sits just below the band.
- Rib lines. Draw short lines across the band at 0.5 pt, fanning around the curve so that they stay at right angles to the neck.
A blend between two rib lines saves you drawing each one, if you are comfortable with Illustrator's Blend tool. Make sure they run all the way round.
There is more on this in line weights and stitch lines.
Step 7: Make the back
Select everything except the template, then Option-drag a copy to the side, or copy it to a new artboard. On the copy:
- Delete the inside back neck, since you cannot see it from behind.
- Raise the neckline to the back neck height. A back neck drops far less than a front neck.
- Rebuild the band and its rib lines to follow the new line.
- Keep the shoulders, sleeves, side seams and hems exactly as they are, because they have to match the front.
Step 8: Check it and name the layers
- Name your layers: Sleeve L, Sleeve R, Body, Neckband, Stitching.
- Fill the body with a colour. Anything that leaks means a shape is not closed.
- Press Cmd + Y to see the outlines and spot stray points.
- Print it, or view it at the size of a tech pack page. If stitch lines blur, make the dashes a little longer.
When it goes into a tech pack, add your callouts and your points of measure.
Easy changes to make next
Once your T-shirt is saved, try these on a copy. Each one teaches you something new.
- Lower the neck into a scoop neck or a V-neck.
- Swap the sleeve for a puff sleeve or a raglan.
- Widen the body and drop the shoulder for an oversized fit.
- Cut it short for a boxy crop.
Questions people ask
How do I make a T-shirt flat look less stiff?
Mostly by using real curves. The armhole, the sleeve head and the side seam all have a slight bend. Make sure the neckline drops in a true curve and the hem has a very slight arc. A few short fold lines near the underarm can help too.
What is the difference between a T-shirt flat and a shirt flat?
A T-shirt is knit, with a rib neckband and stitched hems. A woven shirt has a collar, a button placket, a yoke, cuffs and often a curved hem. It has more pieces, though the method is the same.
How wide should the neck be on a T-shirt flat?
A regular crew neck is usually around a third of the shoulder width. In the drawing on this page, the neck opening is about 32 percent of the shoulder width. Change it to suit the design, then record the real number in your spec.
How do I show a twin needle hem on a flat?
Draw two parallel dashed lines close together, set in from the hem edge by the depth of the hem. Name the stitch in your notes as well, since a drawing alone cannot say whether it is a twin needle or a coverstitch.
Can I use this method for a long sleeve T-shirt?
Yes. The body stays the same. Extend the sleeve down to the wrist, taper it, and finish it with a rib cuff or a plain hem. With the arms held out in the template, the sleeve will fall at an angle.
Do I need a template to draw a T-shirt flat?
You can draw without one, but it is hard to keep the proportions right. A template also means that your next garment will match this one. If you do not have one, photograph a T-shirt laid flat and trace that.