Tech packs · 6 min read
What is a tech pack?
The document that turns a design into something a factory can quote and sew. Here is what goes in one, page by page, with a worked example.
The short answer
A tech pack is a set of pages that tells a manufacturer exactly how to make a garment. It normally holds technical flats, construction notes, measurements for each size, a bill of materials, colourways, and label and packaging details. Factories use it to quote a price, make samples and check the finished goods.
What a tech pack is for
A designer knows what they want. A factory knows how to sew. A tech pack is how one tells the other, often across languages and time zones, with no chance to wave a sleeve around in a meeting.
It does three practical jobs:
- Quoting. A factory can only price what it can see. Fabric, trims, stitch types and sizes all change the cost.
- Sampling. The sample room works from it, so a gap in the pack tends to come back as a mistake in the sample.
- Checking. When goods arrive, the pack is the agreement you measure them against.
What goes in a tech pack, page by page
No two companies lay this out the same way, and that is fine. These are the parts nearly every factory expects, in the order they tend to appear.
1. Style summary
The front page. Style name and number, season, designer, sample size, date, version, and a flat so anyone can see at a glance which garment this is.
2. Technical flats
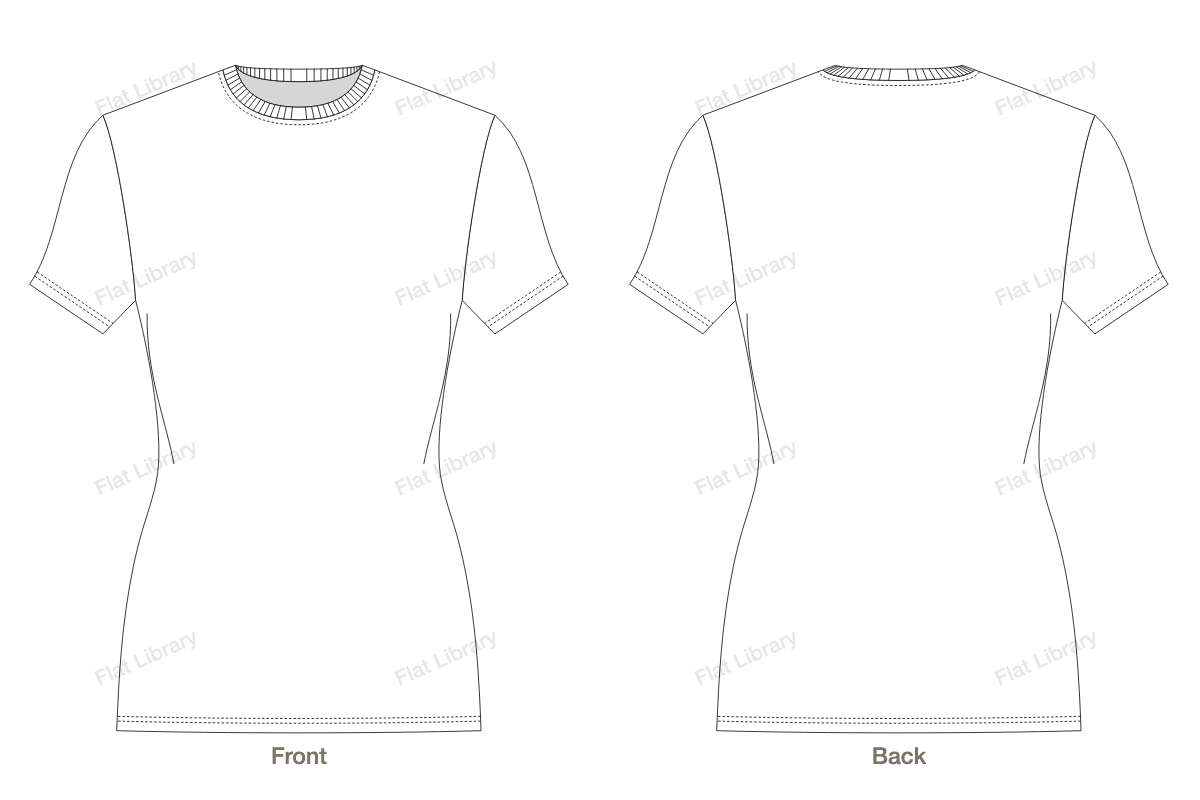
The technical flats, front and back, at a good size, with close-ups of anything complicated. Everything else in the pack refers back to these drawings, so they need to be right.
3. Construction and stitch notes
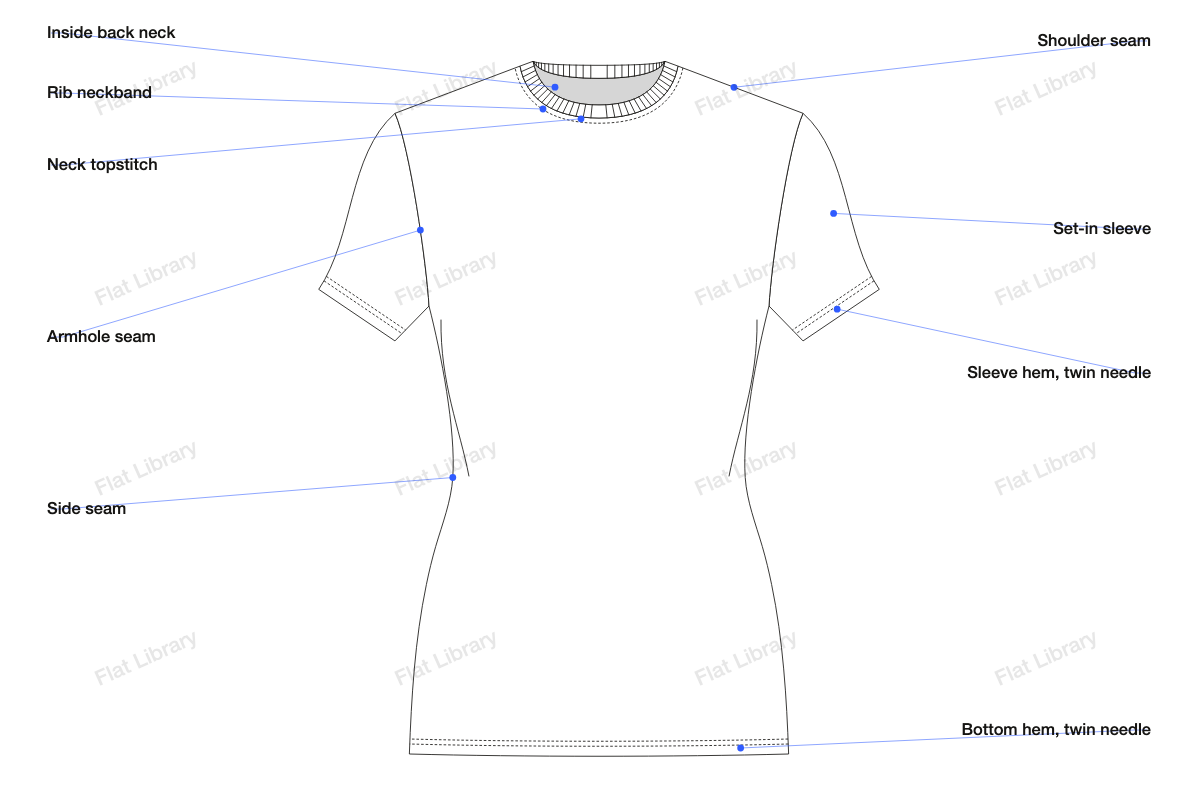
How it goes together. Callouts on the flat name each seam, stitch and finish. Saying "standard stitch" tells a factory very little. Name the stitch and where it goes: twin needle coverstitch on the sleeve hem, 4-thread overlock on the side seams.
4. Points of measure
A table of every measurement, usually with a letter for each one and a diagram showing where it is taken from. State whether the numbers are full or half measurements, and how the garment is laid out when it is measured.
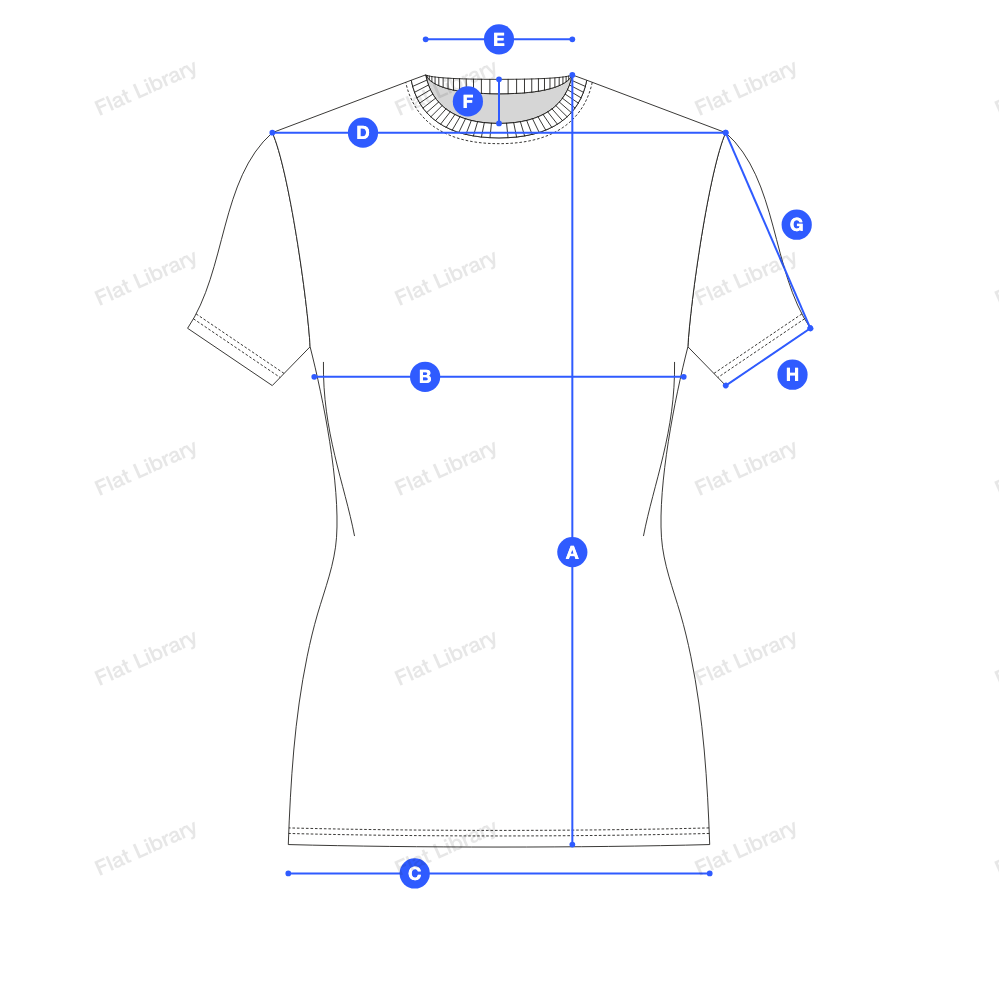
| Point of measure | A common way to take it | |
|---|---|---|
| A | Body length | High point of shoulder down to the hem |
| B | Chest | Side to side, a set distance below the armhole |
| C | Hem width | Side to side along the bottom edge |
| D | Shoulder width | Shoulder point to shoulder point |
| E | Neck width | Across the neck opening, at the shoulder seams |
| F | Front neck drop | Top of the neck down to the front neckline |
| G | Sleeve length | Shoulder point to the end of the sleeve |
| H | Sleeve opening | Across the sleeve hem |
5. Grading and tolerances
Grading is how each measurement changes from size to size. Tolerance is how far a finished garment may stray from the number and still pass. Without a tolerance, nobody can say whether a garment that is a quarter inch off is a fault.
6. Bill of materials
The BOM lists everything that goes into the garment: fabric, lining, thread, zips, buttons, elastic, labels. Include supplier and reference codes when you have them, plus weight and composition. A pack that names the main fabric but forgets thread colour and zip type leaves the factory to choose for you.
7. Colourways and artwork
Each colour version, with a reference a factory can match, such as a Pantone code or a lab dip. Prints and embroidery get their own page with size and placement, measured from a fixed point like the centre front or shoulder seam.
8. Labels and packaging
Neck label, care label and where they go, plus folding, polybags, hangtags and carton instructions. It is dull, and it is expensive to fix later.
9. Change log and sample comments
What changed, when, and why. After each sample, add comments and photos. Mixing up versions is a very common way to get a sample back with a mistake you already fixed.
A tech pack example
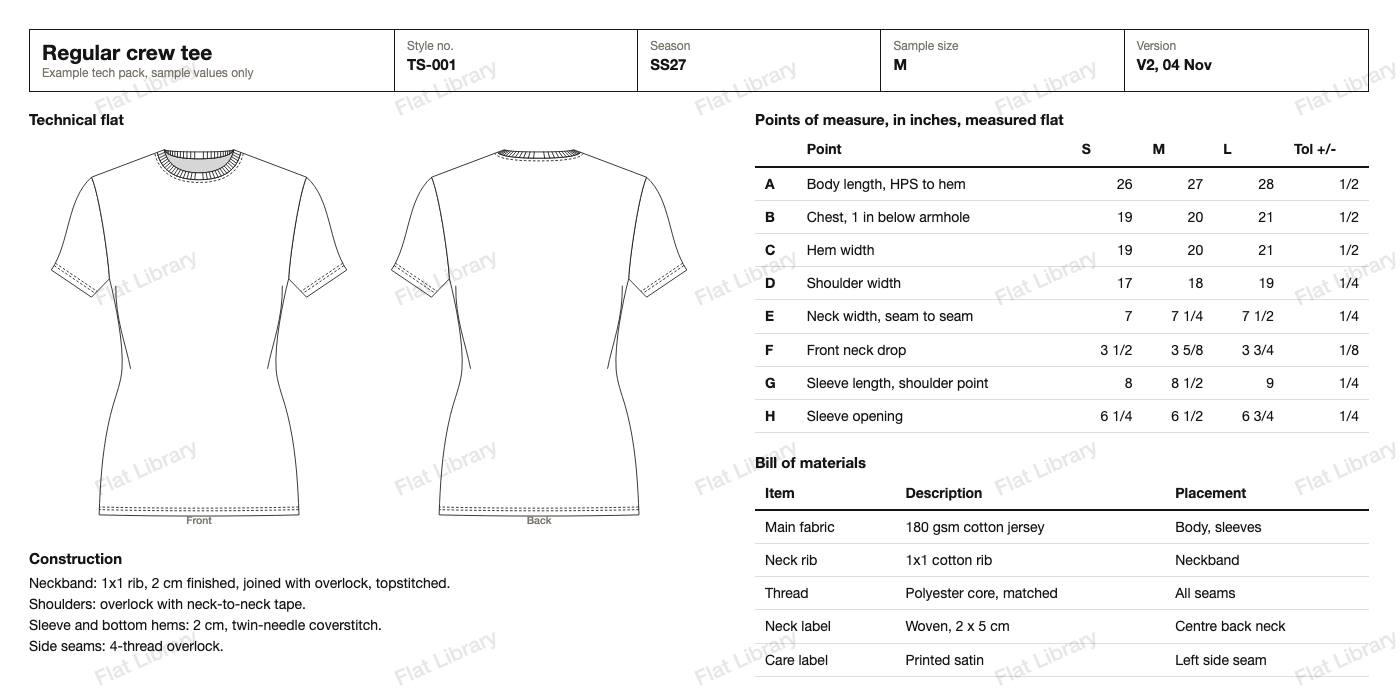
The picture at the top of this page shows many of these parts on a single sheet: header, flats, construction notes, points of measure and a short BOM. Real packs usually spread this across several pages. Yours can start simple and grow as the style gets more complicated.
Common tech pack mistakes
- Vague words. "Soft cotton" is not a fabric spec. Weight in grams per square metre, composition and construction are.
- No back view. Half the construction lives on the back.
- Measurements with no method. A chest number means little until you say where it is taken.
- Missing tolerances. You lose your basis for rejecting anything.
- Pretty flats with no information. Stitch lines that look nice but do not match the notes.
- Old versions in circulation. Date every version and say which one is current.
- Too much noise. The important instruction gets lost on page thirty. Keep it clear, and put each thing in one place.
How to make a tech pack
- Draw the flats first. Front and back, in proportion, with all seams and stitching. Our guide on drawing flats in Illustrator covers how.
- Pick a template. A spreadsheet is fine to start with. Ask your factory if it has one.
- Add construction callouts directly onto the flats.
- Write the points of measure. Starting from a garment you already like the fit of is the simplest way.
- List every material in the BOM, down to the thread.
- Add colourways, artwork and labels.
- Read it as if you were the factory. Anything you would have to ask about, write down.
- Send it, make a sample, update it. A tech pack keeps changing through each sample round.
If you would rather hire this out, here is what a tech pack tends to cost, and which parts you can do yourself to pay less.
Questions people ask
What does a tech pack include?
Usually a style summary, front and back technical flats, construction and stitch notes, a points of measure table with grading and tolerances, a bill of materials, colourways, artwork placement, label and packaging details, and a log of changes.
Who makes the tech pack?
Depending on the size of the company, a technical designer, a product developer, the designer or the founder. Small brands often hire a freelance technical designer for it.
Do I need a tech pack for a small run?
It is worth having one even for fifty pieces. A small workshop may accept less than a large factory, but the flats, measurements and materials still have to be written down somewhere, or the first sample becomes the place you find out what you forgot.
Is a tech pack the same as a spec sheet?
A spec sheet usually means the measurement page alone, though some companies use the words for the whole document. A tech pack is the full set of pages, with the spec sheet as one part of it.
What format should a tech pack be in?
A PDF is the safest thing to send, because it looks the same everywhere. Most people build it in Excel, Google Sheets, Illustrator or dedicated tech pack software, then export. Ask your factory if it has a preferred format.
How long does a tech pack take to make?
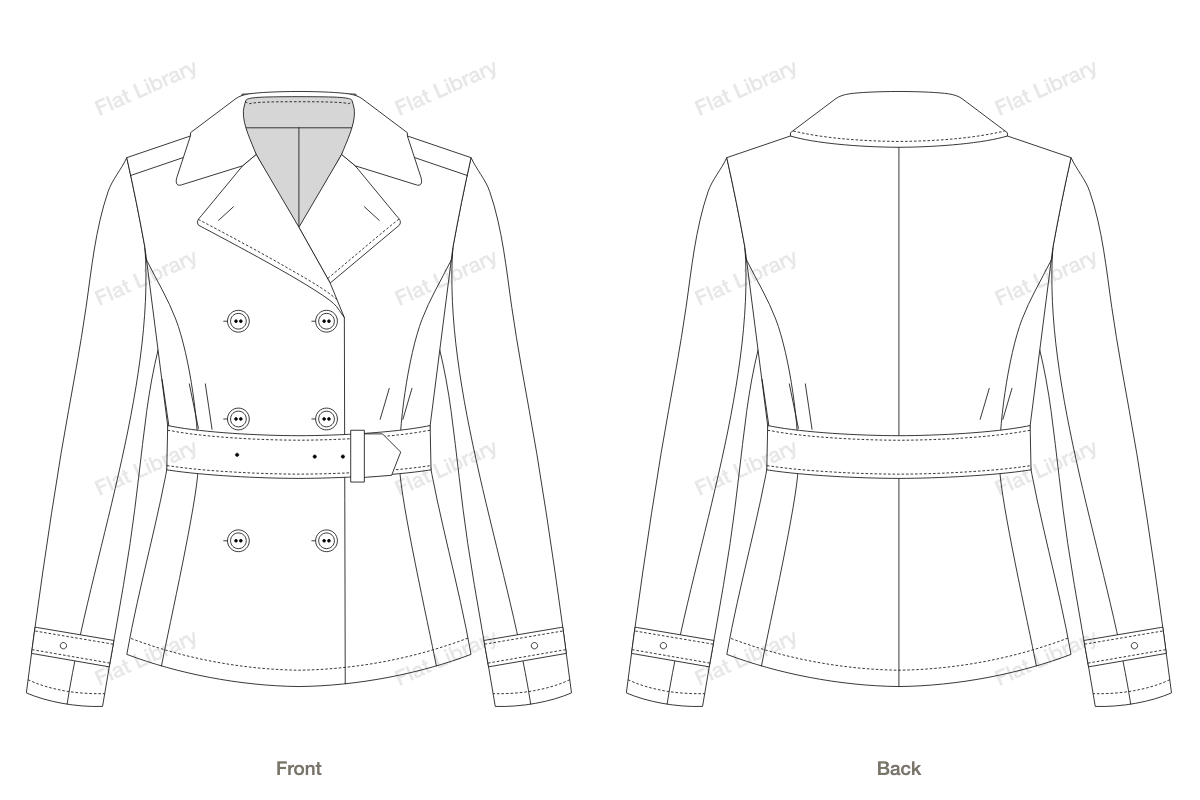
It depends on the garment and on how much you have already decided. A plain T-shirt is much quicker than a lined jacket. Most of the time goes on deciding details, rather than on filling in the pages.