Technical flats · 6 min read
Line weights and stitch lines for technical flats
There is no official standard for this, which is why so many flats look muddy. Here is a simple system that holds up, with the exact numbers we use.
The short answer
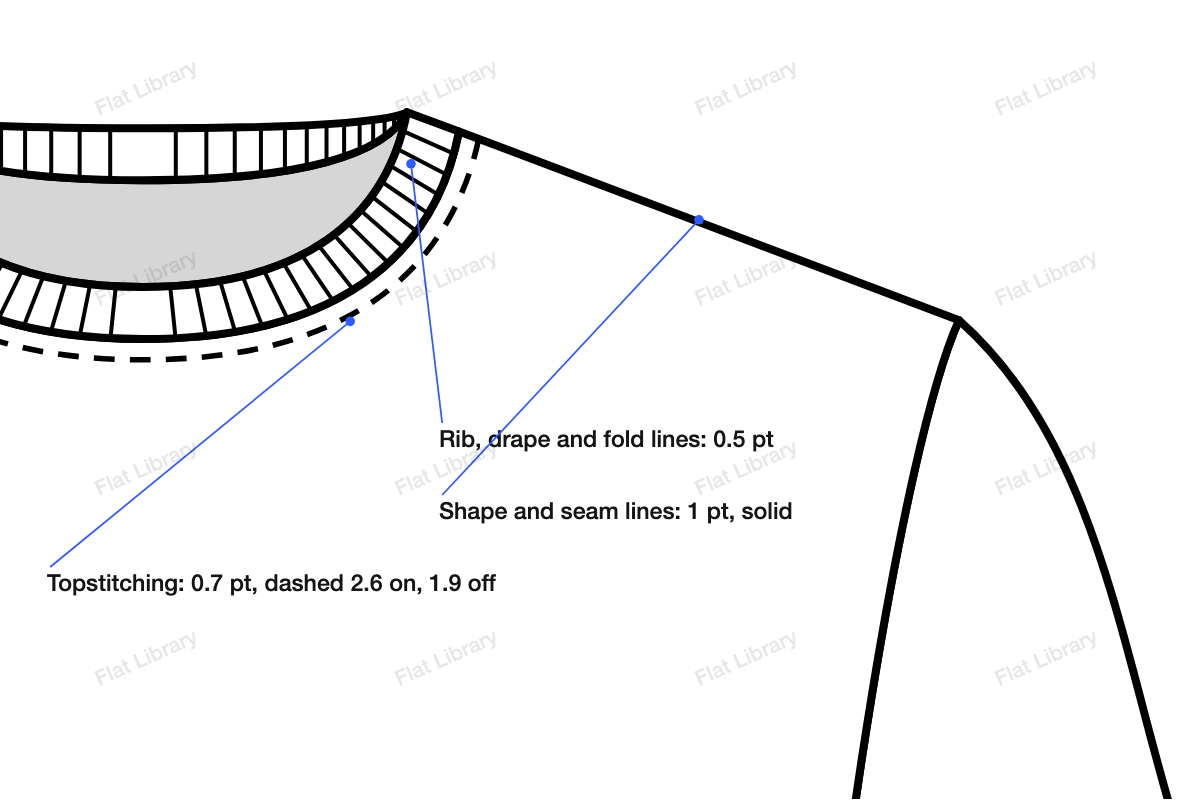
There is no single industry standard for line weights on technical flats, so most teams set their own. A dependable system is three weights: 1 pt solid for garment shapes and seams, about 0.7 pt dashed for stitching, and 0.5 pt for fine detail like ribs, folds and gathers. What matters most is using the same rules on every flat.
Why line weight matters
A flat is read fast. A patternmaker should be able to glance at it and separate three things: the shape of the garment, where pieces join, and where thread shows on the surface. If every line is the same weight and style, all three blur together, and at print size your stitching turns into a grey smudge.
Line weights give you a built-in visual order, without any notes.
A simple system that works
Here is what Flat Library's engine uses for every garment it draws. It is one good system among several, and you are welcome to copy it.
| What it is | Weight | Style |
|---|---|---|
| Garment shapes and seams | 1 pt | Solid, round joins |
| Topstitching and hems | 0.7 pt | Dashed, 2.6 on and 1.9 off |
| Rib lines, smocking | 0.5 pt | Solid, round caps |
| Drape, fold and gather lines | 0.5 pt | Solid, tapered at both ends |
| Bartacks | 1.8 pt | Short and solid |
Some companies add a fourth, heavier weight for the outside silhouette, around 1.5 pt. It makes the garment pop on a busy page, but it does mean tracking the outline separately from the seams.
Setting this up in Illustrator
- Open the Stroke panel, and choose More Options if you only see the weight.
- For stitching, set the weight, tick Dashed Line, and enter a dash and gap.
- Pick the dash option that aligns to corners and path ends. Without it, corners can land on a gap and look broken.
- Open the Graphic Styles panel and save each look with a clear name, such as Stitch 0.7 or Shape 1.0.
- Put stitching on a layer of its own, so you can select or hide all of it together.
Then test it. Print a flat at tech pack size, or view it at that size, since weights that look fine zoomed in can vanish on a page.
How to draw each kind of stitch
Single needle topstitch
One dashed line, parallel to an edge or seam. Use Object > Path > Offset Path to keep the distance even. Keep it close, since the gap you draw suggests the real margin.
Twin needle and coverstitch
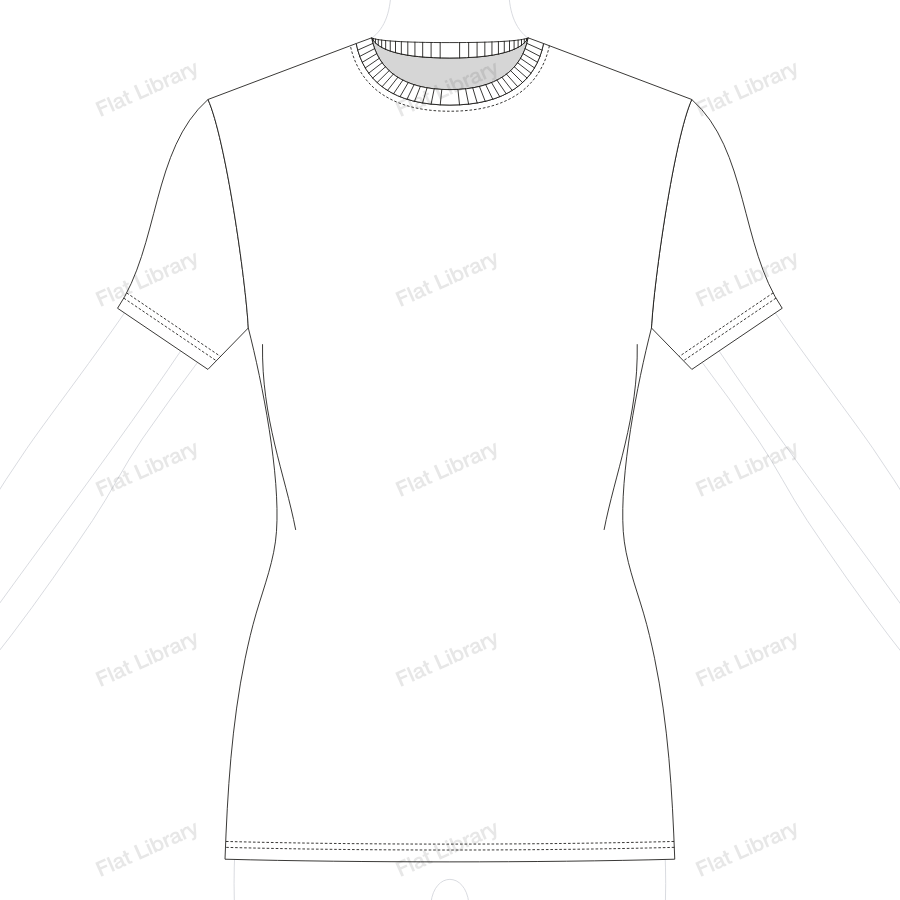
Two dashed lines close together, typically on knit hems. The two look much the same from outside, so write down which one you want.
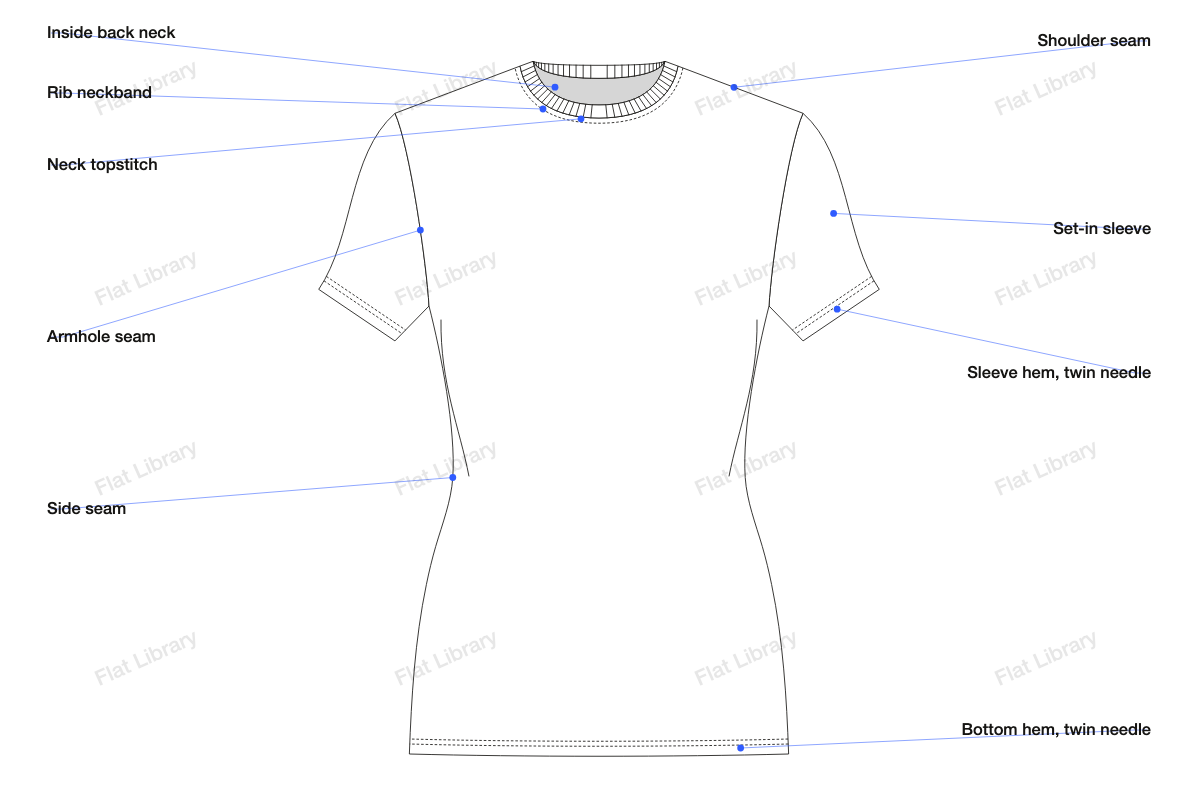
Edge stitch
A single dashed line right next to the edge, as on a collar or a pocket. Draw it nearer to the edge than a normal topstitch, so it reads differently.
Bartack
A very short, thick line, or a tight zigzag, at a point of stress such as a pocket corner, belt loop or fly end. It needs to be heavier than a seam line, and you only need a few.
Zigzag and decorative stitches
Build these with a pattern brush: draw one repeat, drag it into the Brushes panel, choose New Pattern Brush, then apply it to any path. You will want one each for zigzag, scallop and blanket stitch at most.
Ribbing
Short, fine lines at right angles to the edge. Keep them evenly spaced. On a curve, they should fan out, staying square to the line, and they should not all point in one direction.
Gathers, pleats and folds
Short fine lines that start at the seam and fade out. Tapering the ends, using the Width tool or a tapered brush, stops them looking like seams. Keep them few, because a handful does the same job as dozens and prints far better.
A drawing shows where. Words say what.
Two dashed lines could be several different machine stitches. Your drawing says where the stitching goes, and a callout says what it is. On a production tech pack, name the stitch, the width and any spacing.
The international standard for stitch types is ISO 4915, and many factories know the common numbers. In the US, ASTM D6193 covers similar ground. Here are the ones you will see most.
| Stitch | ISO 4915 | Where you might see it |
|---|---|---|
| Lockstitch | 301 | Wovens, seams and topstitching |
| Chainstitch | 401 | Denim seams and long seams |
| Two-needle coverstitch | 406 | Knit hems and bindings |
| Overlock, 3-thread | 504 | Edge finishing |
| Overlock, 4-thread | 514 | Knit seams |
| Three-needle covering stitch | 605 | Flat seams on activewear and underwear |
If you are not sure, ask your factory. They will tell you which machines they have, and that can change how you design the garment.
Common mistakes
- Everything at 1 pt. Seams and stitching run together.
- Very fine dashes. They look lovely on screen, and turn into a solid grey line in a PDF.
- Stitching that runs past the seam it follows. A real stitch line stops at the edge or corner.
- Changing the weights when scaling. Turn on Scale Strokes & Effects in Preferences > General when you scale a flat down, or the lines will look too heavy.
- A different style for every flat. A range should look as though one person drew it, even if five did.
Questions people ask
What line weight should I use for fashion flats?
Start with 1 pt for outlines and seams, about 0.7 pt for stitching and 0.5 pt for details. Check them at the size you will print. Some companies use a heavier outline, around 1.5 pt, to make the silhouette stand out. Any system works if the same one is used throughout.
Should topstitching be dashed on a flat?
Yes, in almost every design room. A dashed line says "stitch" and a solid line says "seam or edge". Because the drawing cannot tell a factory the exact stitch type, you still need to name it in a callout.
How do I make dashed stitch lines in Illustrator?
Select the path, open the Stroke panel, tick Dashed Line, and enter a dash and gap such as 2.6 pt and 1.9 pt. Click the option that aligns dashes to corners and path ends, so the corners stay tidy. Save it as a graphic style to reuse it.
What is the difference between a coverstitch and a twin needle?
Both look like two parallel rows from the outside. A coverstitch is made on a dedicated machine with a looper that covers the raw edge underneath and stretches well, so it is common on knits. A twin needle lockstitch has no such cover. A flat cannot show this difference, so name it in your notes.
How do I draw an overlock on a flat?
You usually do not, because an overlock often sits inside the garment and cannot be seen from the outside. When it is visible on purpose, as a design feature, use a zigzag or scallop pattern brush. Either way, name it in the construction notes.
Do I need to use ISO stitch numbers?
Not for a flat, and small factories may not use them. On a production tech pack they remove doubt, especially for stitches that look alike. Writing both, as in "coverstitch, ISO 406", is the clearest of all.